

Supplies
Scrap kit of choice - I am using "Adoration" by Gemini CreationZ available from Gemini Creationz, Totally Sweet Designs, Twilight Scraps and Paradise 4 Scrappers
Tube of choice - I am using the lovely artwork of Cathy Hubbard with permission
**PLEASE DO NOT USE HER ARTWORK WITHOUT THE APPROPRIATE PERMISSION**
Fonts of choice - I am using BickhamScript Pro RegularBickhamScriptFancy
Plugins: Xero > Improver, Radiance and Soft Mood
Mura Meister > Copies
Eye Candy 4000 > Gradient Glow (optional)
Let's begin...
Open a new 600 x 600 blank canvas flood-filled white
Paste Frame1 as new layer
Resize by 70%
Select inside Frame with Magic Wand
Selections > Modify > Expand by 10
Add a new raster layer
Paste Paper of choice INTO selection
Layers > Arrange > Move Down
OR
Paste Image of choice as new layer
Resize as necessary and position
Layers > Arrange > Move Down (behind Frame)
Selections > Invert
Delete then deselect
Effects > Plugins > Xero > Improver with default settings
Effects > Plugins > Xero > Radiance with default settings
Lower opacity to 40 or just enough to give it a slight softness
Paste DiamondSwirl as new layer
Resize by 45%
Position in the lower right of Frame
Duplicate, then Image > Mirror
Layers > Merge > Merge Down
Paste HeartPin as new layer
Image > Rotate by 5 to the right
Resize by 20%
Position in the centre between Swirls
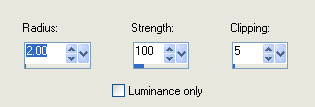
Adjust > Sharpness > Unsharpen Mask with the following settings:
Paste StemRose1 as new layer
Resize by 35%
Position to lower left and place BEHIND Swirl
Paste StemRose2 as new layer
Image > Rotate by 15 to the left
Resize by 35%
Position to lower left and slightly down
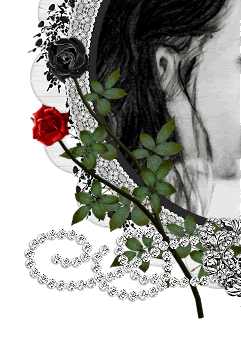
Paste BlkRibBow as new layer
Image > Rotate by 15 to the left
Resize by 45%
Place over Rose Stems
Paste wsqhrt as new layer
Resize by 35%
Position to the lower right
Duplicate, then Image > Mirror
Resize by 90%
Adjust > Sharpness > Sharpen
Position between heart and centre heart pin
Paste rsqhrt as new layer
Image > Mirror
Resize by 30%
Position to the lower right in front of White heart
Activate StemRose1 again (red rose)
Duplicate, then Image > Mirror
Paste StemRose2 (black rose) as new layer again
Image > Mirror
Image > Rotate by 10 to the left
Resize by 35%
Position in lower right with Red Rose behind sequined hearts to liking
Erase any excess
Layers > Merge > Merge Down
Duplicate, then Image > Mirror and position with first roses

Paste RedGltSwl as new layer
Image > Mirror
Image > Rotate by 5 to the right
resize by 75%
Position to the left
Effects > Plugins > Simple > Top Left Mirror
Layers > Arrange > Send to Bottom
Lower opacity to 35
Paste Flower6 as new layer
Resize by 15%
LEAVE IN POSITION!!
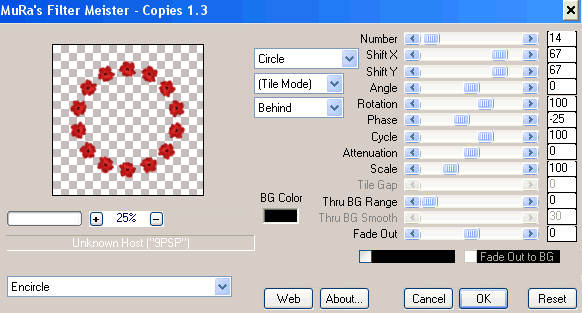
Effects > Plugins > Mura Meister > Copies with the following settings:
Layers > Arrange > Send to Bottom
Effects > Plugins > Xero > Soft Mood with default settings, then
Effects > Plugins > Xero > Radiance with default settings
Paste any other elements you wish to your liking
Crop and resize
Paste Paper of choice as new layer
Layers > Arrange > Send to Bottom
Layers > New Mask Layer > From Image
WSL_Mask133
OK
Layers > Merge > Merge Group
Resize by 95%
Lower opacity to 25
Select your Text Tool and font of choice
I am using BickhamScript Pro Regular
Text colour is #400101
Type out text of choice
Objects > Align > Horizontal Centre in Canvas
Convert to raster layer
Apply a drop shadow of choice
Select another font of choice
I am using BickhamScriptFancy
Same Text colour
Type out your name
Objects > Align > Horizontal Centre in Canvas
Convert to raster layer
Apply a Gradient Glow and drop shadow of choice
Finally, add your © copyright, licence and watermark, then save as GIF or JPG and you're done!
** IF YOU WISH TO ANIMATE PLEASE FOLLOW THESE NEXT STEPS **
Activate your Mask layer
Duplicate twice and rename Mask1, Mask2 and Mask3
Hide Mask2 and Mask3
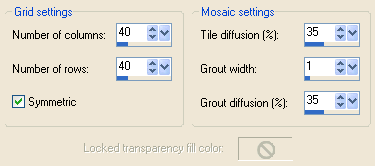
Effects > Texture Effects > Mosaic - Antique with the following settings:
Hide Mask1 and activate Mask2
Repeat Mosaic - Antique effect, changing the Grout diffusion to 36
Hide Mask2 and activate Mask3
Repeat Mosaic - Antique effect, changing the Grout diffusion to 37
Now to animate!
Activate Mask1
Edit > Copy Merged
In Animation Shop
Edit > Paste as New Animation
Hide Mask1 and activate Mask2
Edit > Copy Merged
In Animation Shop
Edit > Paste after Current Frame
Hide Mask2 and activate Mask3
Edit > Copy Merged
In Animation Shop
Edit > Paste after Current Frame
Save as a GIF and you're done!
Thanks for trying my tutorial!
::st!na::
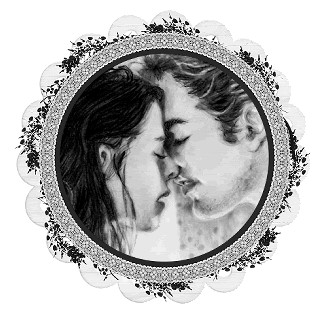
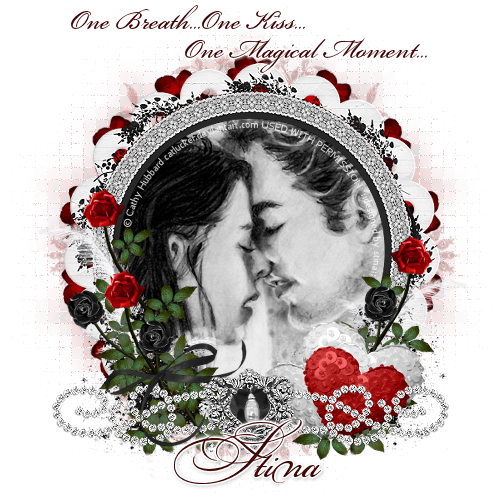
Here is a non-animated version:
© Tutorial written by Stina on 9th September 2009
All rights reserved
No comments:
Post a Comment