
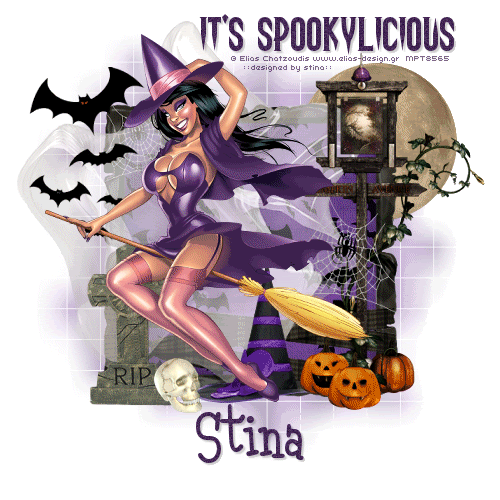
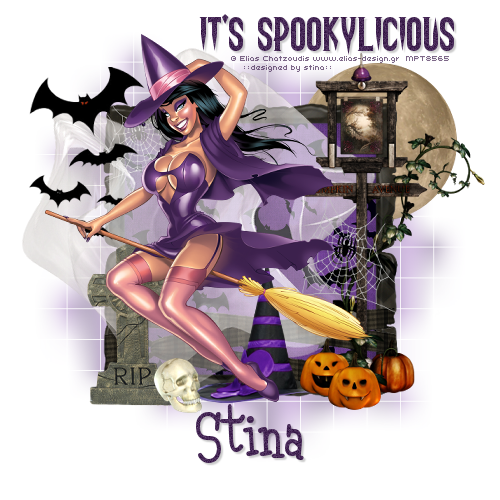
Supplies
Scrap kit of choice - I am using "Spookylicious" by Creative Intentionz' available from Twilight Scraps
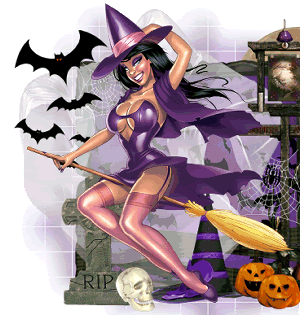
Tube of choice - I am using the artwork of Elias Chatzoudis available with a licence from My PSP Tubes
**PLEASE DO NOT USE HIS ARTWORK WITHOUT THE APPROPRIATE LICENCE**
WSL_Mask84 by Chelle available from her blog
Fonts of choice - I am using Haunting Attraction and Malihini Tahitian BTN Cond
Plugins: Adjust > Variations
Let's begin...
Open a new 600 x 600 blank transparent canvas
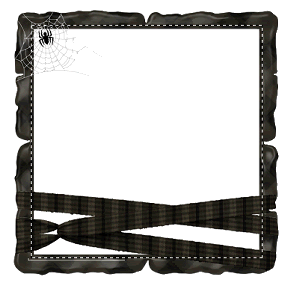
Paste Frame of choice as new layer
Resize by 80%
Using your Selection Tool carefully make a selection around the inside of your Frame
Add a new raster layer
Layers > Arrange > Move Down
Paste Paper of choice INTO selection
Deselect
Activate top layer
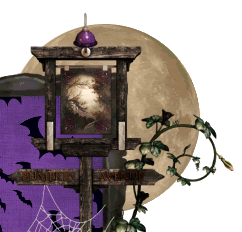
Paste Sign as new layer
Resize by 55%
Position to the left
Paste SpiderWeb as new layer
Image > Mirror
Resize by 30%
Position over sign to liking
Paste Pumpkin1 and Pumpkin2 as new layers
Resize each by 15%
Position at the base of Sign
Paste a GraveStone as new layer
Resize by 35%
Position to the lower left
Paste Skull as new layer
Resize by 25%
Position at the base of GraveStone
Paste WitchesHat1 as new layer
Resize by 40%
Position BEHIND Skull and Pumpkin layers but ABOVE the SpiderWeb layer
Duplicate
Then select the Purple areas of the hat with your Magic Wand
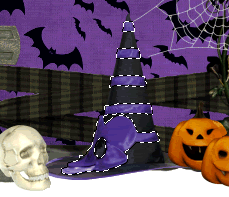
Effects > Plugins > Adjust > Variations
Click on "More Magenta" (if using the Purple Hat)
OK
Lower opacity of layer to 70
Layers > Merge > Merge Down
Paste Bats as new layer
Resize by 70%
Position to upper left
Paste FullMoon as new layer
Resize by 50%
Position in upper right
Layers > Arrange > Send to Bottom
Paste Tube as new layer
Resize as necessary
Position to liking
Paste Ghost as new layer
Resize by 60%
Position to the upper left BEHIND Tube, Bats and GraveStone
Adjust > Brightness & Contrast > Brightness/Contrast with the following:
Brightness - 50
Contrast - 0
Paste Paper of choice as new layer
Layers > Arrange > send to Bottom
Adjust > Blur > Gaussian Blur with a radius of 10.00
Layers > New Mask Layer > From Image
Apply WSL_Mask84
OK
Layers > Merge > Merge Group
Lower opacity to 40
Crop and resize to liking
Select your Text Tool and font of choice
I am using Haunting Attraction
Text colour is #462856
Type out your text of choice position to liking
Convert to raster layer
Apply any effect and drop shadow of choice
Select another font of choice
I am using Malihini Tahitian BTN Cond
Same text colour
Type out your name
Objects > Align > Horizontal Centre in Canvas
Convert to raster layer
Add some noise and drop shadow of choice
Finally, add your © copyright, licence and watermark, then save as a GIF or JPG and you're done!
** IF YOU WISH TO ANIMATE PLEASE FOLLOW THESE NEXT STEPS **
Activate your Ghost layer
Duplicate five times and rename Ghost1 through to Ghost6
Activate Ghost1
Effects > Distortion Effects > Wave with the following settings:

Hide Ghost1 and activate Ghost2
Repeat Wave, adjusting the Wavelength to 32
Hide Ghost2 and activate Ghost3
Repeat Wave once again, adjusting the Wavelength to 34
Repeat Wave effect up to Ghost6 adjust wavelength by 2 each time
Now to animate!
Activate Ghost1 and hide Ghost2 and Ghost3
Edit > Copy Merged
Open Animation Shop
Edit > Paste as New Animation
Back to PSP
Hide Ghost1 and activate Ghost2
Edit > Copy Merged
In Animation Shop
Edit > Paste After Current Frame
Back to PSP
Hide Ghost2 and activate Ghost3
Edit > Copy Merged
In Animation Shop
Edit > Paste After Current Frame
Back to PSP
Hide Ghost3 and activate Ghost4
Edit > Copy Merged
In Animation Shop
Edit > Paste After Current Frame
Back to PSP
Hide Ghost4 and activate Ghost5
Edit > Copy Merged
In Animation Shop
Edit > Paste After Current Frame
Back to PSP
Hide Ghost5 and activate Ghost6
Edit > Copy Merged
In Animation Shop
Edit > Paste After Current Frame
Select all and paste Frames as new animation
Select all again, then Animation > Reverse Frames
Select all, copy, then activate last Frame on original animation and paste AFTER current frame
You should now have 12 Frames
Select all and change Frame Properties to 20
Now save as a GIF and you're done!
Thanks for trying my tutorial!
::st!na::
Here is a non-animated version:
© Tutorial written by Stina on 12th September 2009
All rights reserved
No comments:
Post a Comment