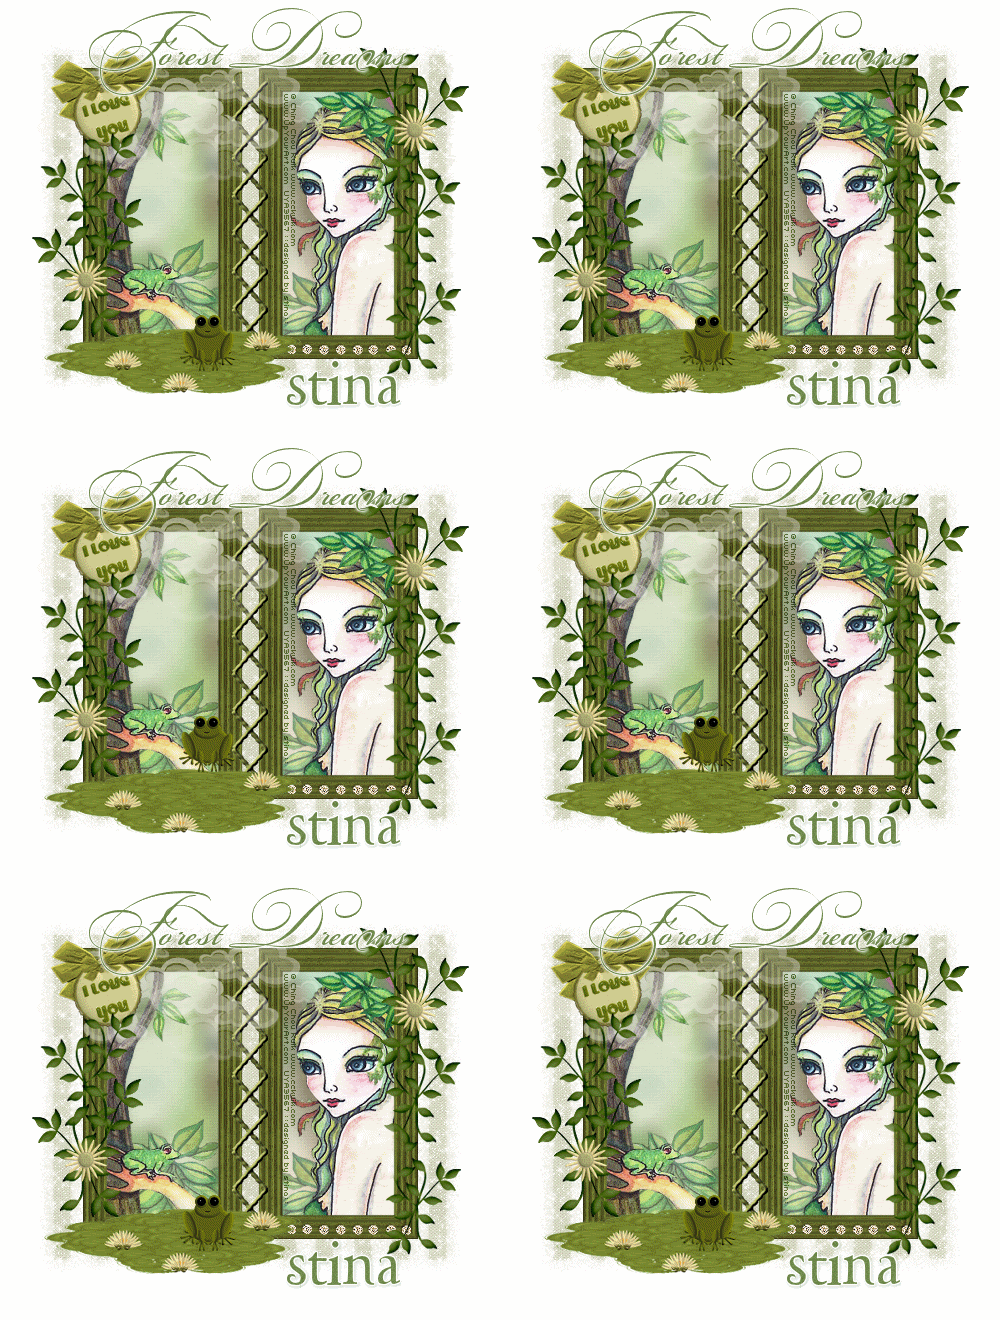
Supplies
Scrap kit of choice - I am using "The Frog Prince" by Tootypup Scraps available from Twilight Scraps, Stargazer Scraps, Scraps with Attitude, Paradise 4 Scrappers, Katelynn Designs and Dazzling Scraps
Tube of choice - I am using the artwork of Ching Chou Kuik which is available for purchase with a licence from Up Your Art
**PLEASE DO NOT USE HER ARTWORK WITHOUT THE APPROPRIATE LICENCE**
WSL_Mask185 by Chelle available from her blog
Cassel Basic Stitches Font (for Stitching) which can be purchased here
Fonts of choice - I am using BickhamScriptFancy and LD Twylight
Plugin: Eye Candy 4000 Gradient Glow and Xenofex 2 Constellation
Let's begin....
Open a new 700 x 500 blank canvas flood-filled white
Paste Frame02 Set02 as new layer
Image > Rotate by 90
Resize by 50%
Image > Rotate by 90
Resize by 50%
Pick a colour from your Tube with your Eye Dropper Tool and set as your Foreground
Select your Change to Target Tool with the following settings: (or similar)
Select your Change to Target Tool with the following settings: (or similar)

Brush over your Frame with your brush
Move Frame slightly to up and to the left
Duplicate, then Image > Mirror
Layers > Merge > Merge Down
Duplicate, then Image > Mirror
Layers > Merge > Merge Down
Select your Text Tool and choose Cassel Stitches3 (paid font - not supplied)
Type the letter H, ENTER, then H, ENTER, H and so on till you have stitching down the length of the Frame
Type the letter H, ENTER, then H, ENTER, H and so on till you have stitching down the length of the Frame
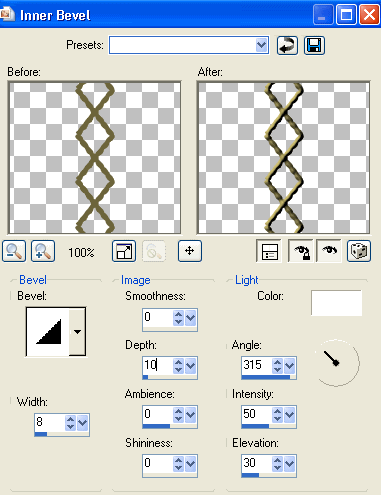
Effects > 3D Effects > Inner Bevel with the following settings:
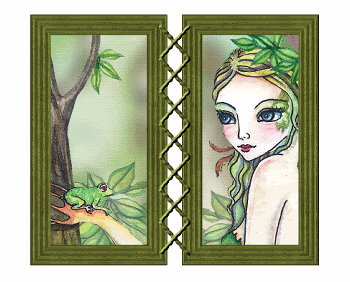
Select the inside of your Frames with your Magic Wand
Selections > Modify > Expand by 10
Paste paper of choice as new layer
Selections > Invert
Delete
Layers > Arrange > Move Down
Selections > Modify > Expand by 10
Paste paper of choice as new layer
Selections > Invert
Delete
Layers > Arrange > Move Down
KEEP SELECTED!!
Paste Tube as new layer
Resize as necessary and position within selections
Selections > Invert
Delete then deselect
Erase any excess to your liking
Resize as necessary and position within selections
Selections > Invert
Delete then deselect
Erase any excess to your liking
Paste Gems as new layer
Position along bottom of right Frame
Erase any overlapping excess
Position along bottom of right Frame
Erase any overlapping excess
Paste LilyPad as new layer
Resize by 45%
Position in lower left
Colourise using your Change to Target Brush again
Resize by 45%
Position in lower left
Colourise using your Change to Target Brush again
Paste WaterLily as new layer
Resize by 10%
Position over the colourised waterlilies on the LilyPad
Resize by 10%
Position over the colourised waterlilies on the LilyPad
Hide Frame, Background, Frame Background, Tube and Stitches
Layers > Merge > Merge Visible
Unhide all layers again
Layers > Merge > Merge Visible
Unhide all layers again
Paste Leaves as new layer
Resize by 50%
Position in upper right
Resize by 50%
Position in upper right
Duplicate then Image > Mirror
Position in lower left
Position in lower left
Paste Flower of choice as new layer
Resize by around 20%
Duplicate and position in Leaves
Resize by around 20%
Duplicate and position in Leaves
Duplicate Leaves again
Resize by 85% and position slightly up
Duplicate again and Image > Mirror
Position on opposite side
Resize by 90%
Duplicate once more and position to create a vine
Layers > Merge > Merge Down
Resize by 85% and position slightly up
Duplicate again and Image > Mirror
Position on opposite side
Resize by 90%
Duplicate once more and position to create a vine
Layers > Merge > Merge Down
With your Selection Tool draw a rectangle around the overhanging leaves
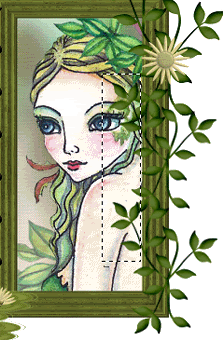
Delete, then deselect
Paste Tag of choice as new layer
Resize by 75%
Position in upper left
Resize by 75%
Position in upper left
Colourise as above
Paste Paper of choice as new layer
Layers > Arrange > Send to Bottom
Layers > Arrange > Send to Bottom
Layers > New Mask Layer > From Image
Apply _WSL_Mask185
OK
Apply _WSL_Mask185
OK
DO NOT MERGE!!!
Select Pick Tool and use nodes to size Mask to your liking
Layers > Merge > Merge Group
Lower opacity to 30
Layers > Merge > Merge Group
Lower opacity to 30
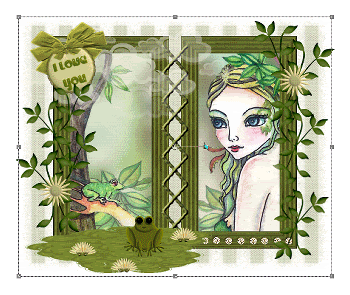
Crop and resize to liking
Apply any drop shadows of choice to your layers
Select your Text Tool and font of choice
I am using BickhamScriptFancy
Text colour of choice - I am using #6f8a4c
I am using BickhamScriptFancy
Text colour of choice - I am using #6f8a4c
Type out text of choice
Objects > Align > Horizontal Centre in Canvas
Convert to raster layer
Add some noise and a soft Gradient Glow
Objects > Align > Horizontal Centre in Canvas
Convert to raster layer
Add some noise and a soft Gradient Glow
Select another font of choice
I am using LD Twylight
Same text colour
I am using LD Twylight
Same text colour
Type out your name and position
Add some noise and a slight Gradient Glow
Apply a drop shadow of choice
Add some noise and a slight Gradient Glow
Apply a drop shadow of choice
Finally, add your © copyright, licence and watermark, then save as a GIF or JPG and you're done!
** IF YOU WISH TO ANIMATE PLEASE FOLLOW THESE NEXT STEPS **
Activate your Frog layer
Duplicate and rename as Frog1 and Frog2
Duplicate and rename as Frog1 and Frog2
Leave Frog1 in postion
Activate Frog2 and move up slightly not quite above Frog1
Activate Frog2 and move up slightly not quite above Frog1
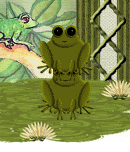
I love this simple animation and have used it before
Now activate your Mask layer
Duplicate twice and rename Sparkle1, Sparkle2 and Sparkle3
Duplicate twice and rename Sparkle1, Sparkle2 and Sparkle3
Activate Sparkle1
Effects > Plugins > Xenofex 2 > Constellation with the following settings:
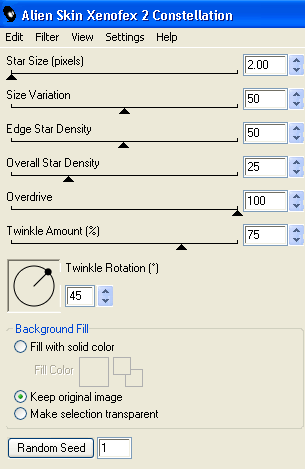
Hide Sparkle1 and activate Sparkle2
Repeat Constellation, adjusting the Random Seed
Repeat Constellation, adjusting the Random Seed
Hide Sparkle2 and activate Sparkle3
Repeat Constellation again, adjusting the Random Seed
Repeat Constellation again, adjusting the Random Seed
Now to animate!
Activate Frog1 and Sparkle 1
Edit > Copy Merged
Edit > Copy Merged
Open Animation Shop
Edit > Paste as new animation
Edit > Paste as new animation
Back to PSP
Hide Sparkle1 and activate Sparkle2
Edit > Copy Merged
Hide Sparkle1 and activate Sparkle2
Edit > Copy Merged
In Animation Shop
Edit > Past After Current Frame
Edit > Past After Current Frame
Back to PSP
Hide Sparkle2 and activate Sparkle3
Hide Sparkle2 and activate Sparkle3
Edit > Copy Merged
In Animation Shop
Edit > Paste After Current Frame
Edit > Paste After Current Frame
Repeat Sparkle animation with Frog2 and once again with Frog1
You should now have a total of 9 Frames
Now save as a GIF and you're done!
Thanks for trying my turorial!
::st!na::
Here is a non-animated version:
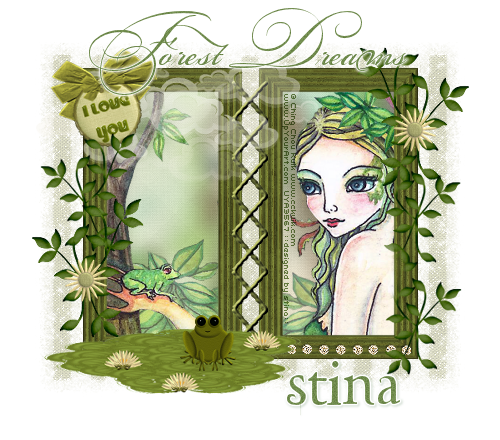
© Tutorial written by Stina on 7th August, 2009
All rights reserved

No comments:
Post a Comment