
Supplies
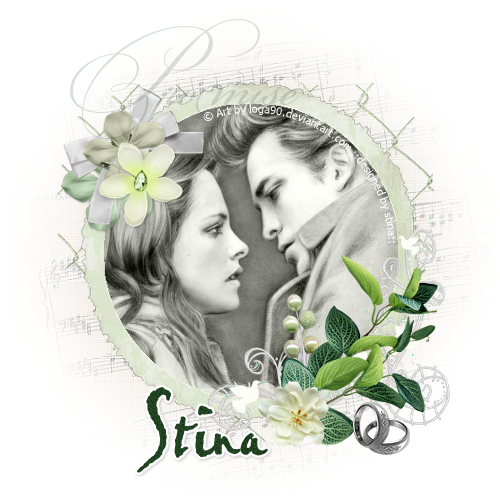
Scrap kit of choice - I am using the gorgeous "Promise Me" kit by Designs by Helly available from Paradise 4 Scrappers and Cotton Candy Kreations
Tube or image of choice - I am using the artwork of Kat aka Loga90 available here
WSL_Mask62 by Chelle available from her blog
Fonts of choice - I am using BickhamScriptFancy and Pablo LET
Plugin: Eye Candy 4000 Gradient Glow (optional)
Ready? Let's begin....
Open a new 600 x 600 blank canvas flood-filled white
Set your Selection Tool to Circle
Position pointer in centre of canvas and draw out circle
Position pointer in centre of canvas and draw out circle
Add a new raster layer
Paste a paper of choice into selection
Paste a paper of choice into selection
KEEP SELECTED!!
Selections > Modify > Contract by 30
Delete then deselect
Selections > Select All, then Float, the Defloat
Effects > Plugins > IC Net Software > Filters Unlimited > Edges, Round
Select Round Edge 17
OK
Select Round Edge 17
OK
Select the inside of Frame with Magic Wand
Selections > Modify > Expand by 10
Add new raster layer
Paste paper of choice into selection
Deselect
Layers > Arrange > Move Down
Selections > Modify > Expand by 10
Add new raster layer
Paste paper of choice into selection
Deselect
Layers > Arrange > Move Down
Paste Flourish as new layer
Image > Rotate by 5 to the left
Resize by 18%
Position to the lower right
Image > Rotate by 5 to the left
Resize by 18%
Position to the lower right
Paste Branch as new layer
Image > Mirror, then
Image > Rotate by 15 to the right
Resize by 25%
Position over Flourish in lower right
Image > Mirror, then
Image > Rotate by 15 to the right
Resize by 25%
Position over Flourish in lower right
Paste Bow as new layer
Image > Rotate by 25 to the right
Resize by 25%
Position over the Branch to your liking
Image > Rotate by 25 to the right
Resize by 25%
Position over the Branch to your liking
Paste WeddingBandSet as new layer
Resize by 40%
Position in lower right alongside Flourish and Branch
Resize by 40%
Position in lower right alongside Flourish and Branch

Paste a Flower as new layer
Resize by 35%
Position in upper left
Resize by 35%
Position in upper left
Paste another Flower as new layer
Resize by 30%
Position over first flower
Resize by 30%
Position over first flower
Paste PinnedFlower as new layer
Resize by 25%
Position over both flowers
Resize by 25%
Position over both flowers
Paste Bow as new layer
Image > Rotate by 30 to the left
Resize by 30%
Position within the Flower cluster between the first and second flowers
Image > Rotate by 30 to the left
Resize by 30%
Position within the Flower cluster between the first and second flowers
Paste Paper of choice as new layer
Layers > Arrange > Send to Bottom
Resize by 60%
Layers > New Mask Layer > From Image
Locate WSL_Mask62
OK
Layers > Merge > Merge Group
Paste HeartShapeFence as new layer
Resize by 90%
Lower opacity to 45
Resize by 90%
Lower opacity to 45
Crop to Mask layer and resize
Activate Frame layer
Paste Tube or Image of choice
Layers > Arrange > Move Down
Resize as necessary
Paste Tube or Image of choice
Layers > Arrange > Move Down
Resize as necessary
Select the inside of Frame with your Magic Wand
Selections > Modify > Expand by 10
Selections > Invert
Delete then deselect
Selections > Modify > Expand by 10
Selections > Invert
Delete then deselect
Activate top layer
Select Text Tool and font of choice
I am using BickhamScriptFancy
Type text of choice
Objects > Align > Horiztonal Centre in Canvas
Convert to raster layer
Lower opacity to 30
I am using BickhamScriptFancy
Type text of choice
Objects > Align > Horiztonal Centre in Canvas
Convert to raster layer
Lower opacity to 30
Select another font of choice
I am using Pablo LET (Bella's handwriting)
Text colour is #204221
Type out your name and position
Convert to raster layer
Apply a slight Gradient Glow in white
Add a drop shadow of choice
I am using Pablo LET (Bella's handwriting)
Text colour is #204221
Type out your name and position
Convert to raster layer
Apply a slight Gradient Glow in white
Add a drop shadow of choice
Finally, add your © copyright, licence and watermark, then save as a GIF or JPG and you're done!
Thanks for trying my tutorial!
::st!na::
::st!na::
© Tutorial written by Stina on 24th May 2009
All rights reserved
All rights reserved
No comments:
Post a Comment