
Supplies
Scrap kit of choice - I am using "Puppy Love" by Nikki Scott available from Elemental Scraps
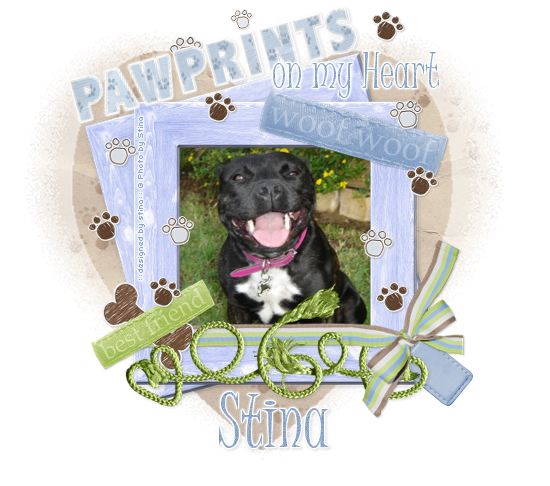
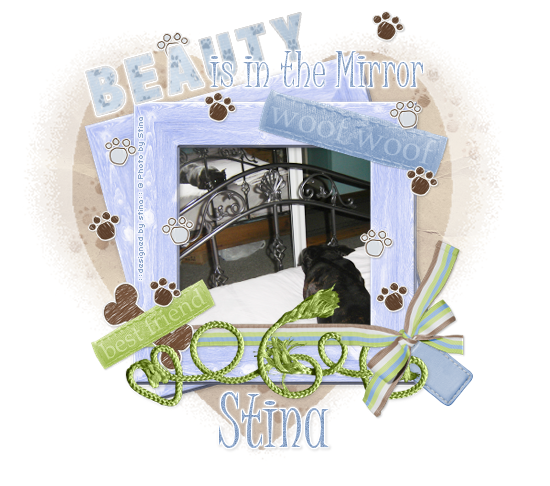
Image or photo of choice - I am using one of my own of my gorgeous puppy, Ciara, who just turned 4 the other day!
40-Kris Mask
Font of choice - I am using Juice ITC
Plugin: Eye Candy 4000 Gradient Glow (optional)
Image or photo of choice - I am using one of my own of my gorgeous puppy, Ciara, who just turned 4 the other day!
40-Kris Mask
Font of choice - I am using Juice ITC
Plugin: Eye Candy 4000 Gradient Glow (optional)
Ready? Let's Begin....
Open a new 600 x 600 blank canvas flood-filled white
Paste Framee as new layer
Resize by 15%
Resize by 15%
LEAVE IN POSITION
Duplicate
On bottom layer Image > Rotate by 15 to the left
Move slightly up
On bottom layer Image > Rotate by 15 to the left
Move slightly up
Activate top frame again
Select the inner area of Frame with Magic Wand
Selections > Modify > Expand by 10
Paste an image or photo of your choice as new layer
Resize as necessary
Selections > Invert
Delete then deselect
Select the inner area of Frame with Magic Wand
Selections > Modify > Expand by 10
Paste an image or photo of your choice as new layer
Resize as necessary
Selections > Invert
Delete then deselect
Paste one of the WordArts as new layer
Image > Rotate by 15 to the right
Resize by 10%
Position in uppper right
Image > Rotate by 15 to the right
Resize by 10%
Position in uppper right
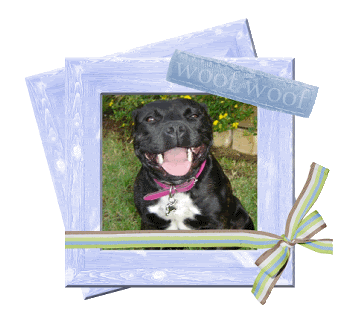
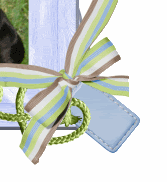
Paste Ribbon3 as new layer
Resize by 10%
Position along bottom of Frame
Resize by 10%
Position along bottom of Frame
Paste Rope2 as new layer
Resize by 10%
Position along bottom of Frame
Resize by 10%
Position along bottom of Frame
On your Ribbon layer use your Magic Wand to select the area around the ribbon
Selections > Invert
Selections > Modify > Feather by 2
Selections > Invert
Selections > Modify > Feather by 2
Activate your Rope layer
With your Eraser Tool erase the part of the rope over the Bow on the Ribbon
With your Eraser Tool erase the part of the rope over the Bow on the Ribbon
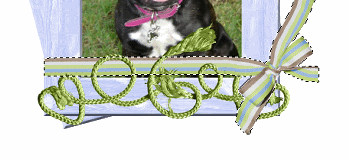
Deselect
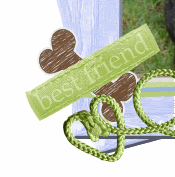
Select another WordArt and paste as new layer
Image > Rotate by 30 to the left
Resize by 7%
Position to the left just above the Rope
Image > Rotate by 30 to the left
Resize by 7%
Position to the left just above the Rope
Paste Bone2 as new layer
Image > Rotate by 40 to the right
Resize by 6%
Layers > Arrange > Move Down
Repeat once
Move to the lower left behind WordArt label and Rope
Image > Rotate by 40 to the right
Resize by 6%
Layers > Arrange > Move Down
Repeat once
Move to the lower left behind WordArt label and Rope
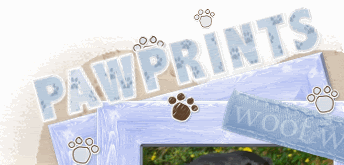
Open PAWS and make a selection around two Paws of choice
Paste each as a new separate layer
Resize both by 10%
Rotate one of the paws by 15 to the right
Duplicate and mirror
Place around tag to your liking
Paste each as a new separate layer
Resize both by 10%
Rotate one of the paws by 15 to the right
Duplicate and mirror
Place around tag to your liking
Hide all layers leaving the Paws visible
Layers > Merge > Merge Visible
Unhide
Layers > Merge > Merge Visible
Unhide
Paste Tag2 as new layer
Image > Rotate by 20 to the left
Resize by 8%
Image > Mirror
Position in lower right below Ribbon in corner
Image > Rotate by 20 to the left
Resize by 8%
Image > Mirror
Position in lower right below Ribbon in corner
Paste Paper of choice as new layer
Resize by 17% (to fit canvas)
Layers > Arrange > Send to Bottom
Resize by 17% (to fit canvas)
Layers > Arrange > Send to Bottom
Image > Canvas Resize to 600 x 530 centred
Layers > New Mask Layer > From Image
Locate 40-kris Mask
OK
Layers > Merge > Merge Group
Lower opacity to around 65
Locate 40-kris Mask
OK
Layers > Merge > Merge Group
Lower opacity to around 65
Crop and resize
Activate top layer
Open one of the Alpha Sheet
Make a selection around each of the letters you wish to use one at a time
Paste the first letter as a new image
Then each one after that as a new layer
Resize each by 6%
Position using even spacing then
Layers > Merge > Merge Visible
Make a selection around each of the letters you wish to use one at a time
Paste the first letter as a new image
Then each one after that as a new layer
Resize each by 6%
Position using even spacing then
Layers > Merge > Merge Visible
Paste your new word as new layer
Position at the top
Image > Rotate by 15 to the left
Position at the top
Image > Rotate by 15 to the left
Select your Text Tool and font of choice
I am using Juice ITC
Text Colour (Background) is #8fa7c9 (or one of your choice)
Type out your corresponding text
Position then convert to raster layer
Apply a slight Gradient Glow for effect
I am using Juice ITC
Text Colour (Background) is #8fa7c9 (or one of your choice)
Type out your corresponding text
Position then convert to raster layer
Apply a slight Gradient Glow for effect
Choose another font or use the same one
Type out your name
Objects > Align > Horizontal Centre in Canvas
Convert to raster layer
Add some noise
Apply a slight Gradient Glow and drop shadow
Type out your name
Objects > Align > Horizontal Centre in Canvas
Convert to raster layer
Add some noise
Apply a slight Gradient Glow and drop shadow
Finally add your © copyright, licence and watermark, then save as a GIF or JPG and you're done!
Thanks for trying my tutorial!
::st!na::
Here is another one (a photo I love of her looking at herself in the mirror from my bed as she often does...LOL)
© Tutorial written by Stina on 30th April 2009
All rights reserved
No comments:
Post a Comment