

Supplies
Scrap kit of choice - I am using "Dreamland" by Tracy of Soxational Scraps
Tube of choice - I am using the lovely artwork of Suzanne Woolcott which can be purchased from her store
Font of choice - I am using 2Peas Fat Frog
Plugin: Alien Skin Xenofex 2 Constellation
PSP and Animation Shop
**Most of the effects here were created in PSP and without the use of Plugins**
Ready? Let's go!!
Open a new 700 x 700 blank canvas flood-filled white
Open Paper2 and minimise
Select your Preset Shape Tool and set to "div39"
In your Materials Palette - set your Foreground to null and your Background to Paper2
In your Materials Palette - set your Foreground to null and your Background to Paper2
On your canvas draw out shape
Objects > Align > Centre in Canvas
Convert to raster layer
Objects > Align > Centre in Canvas
Convert to raster layer
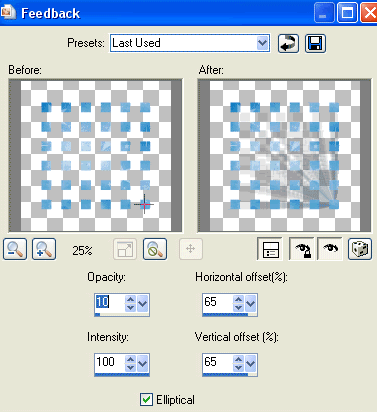
Effects > Reflections > Feedback with the following settings:
Rename Layer BACKGROUND SQUARES
Open Paper5 and minimise
Set your Preset Shape Tool to Rectangle
In your Materials Palette change your Background to Paper5
Set your Preset Shape Tool to Rectangle
In your Materials Palette change your Background to Paper5
Activate your top layer
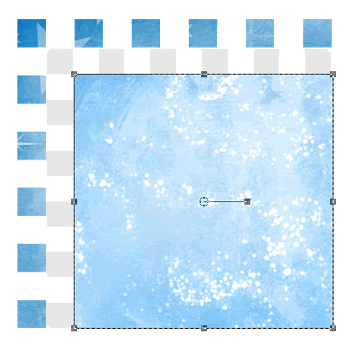
Draw out a rectangle along the edge of the inner squares
Draw out a rectangle along the edge of the inner squares
Convert to raster layer
Rename MAIN CANVAS
Rename MAIN CANVAS
Selections > Select All
Selections > Float
Selections > Defloat
Selections > Float
Selections > Defloat
Add a new raster layer and name it FRAME
Selections > Modify > Contract by 5
Delete and deselect
Delete and deselect
With your Magic Wand select the FRAME
Effects > 3D Effects > Inner Bevel with the following settings:
Effects > 3D Effects > Inner Bevel with the following settings:

Deselect
Duplicate layer and set blend mode to Screen
Layers > Merge > Merge Down
Duplicate layer and set blend mode to Screen
Layers > Merge > Merge Down
Paste Cloud as new layer
Resize by 40%
Duplicate and position
Resize by 40%
Duplicate and position
Paste StarRain2 as new layer
Resize by 58%
Position from top of MAIN CANVAS
Duplicate and set blend mode to Soft Light
Layers > Merge > Merge Down
Resize by 58%
Position from top of MAIN CANVAS
Duplicate and set blend mode to Soft Light
Layers > Merge > Merge Down
Paste Moon as new layer
Resize by 40%
Position in upper left
Resize by 40%
Position in upper left
Paste Cow as new layer
Resize by 45%
Position over the Moon
Resize by 45%
Position over the Moon
Paste Dreamland as new layer
Resize by 75%
Position in upper right
Resize by 75%
Position in upper right
Paste StarBrad1 as new layer
Resize by 10%
Duplicate several times and position each to your liking
Paste same once more and resize by 15%
Resize by 10%
Duplicate several times and position each to your liking
Paste same once more and resize by 15%
Hide each layer but the Star Brads
Layers > Merge > Merge Visible
Rename YELLOW STARS
Unhide layers
Layers > Merge > Merge Visible
Rename YELLOW STARS
Unhide layers
Adjust > Brightness & Contrast > Brightness/Contrast with the following:
Brightness - 25
Contrast - 0
Brightness - 25
Contrast - 0
Paste StarBrad2 as new layer
Resize by 10%
Duplicate several times and position
Resize by 10%
Duplicate several times and position
Hide each layer again including the YELLOW STARS, then
Layers > Merge > Merge Visible
Rename BLUE STARS
Lower opacity to around 50
Layers > Merge > Merge Visible
Rename BLUE STARS
Lower opacity to around 50
Repeat Brightness
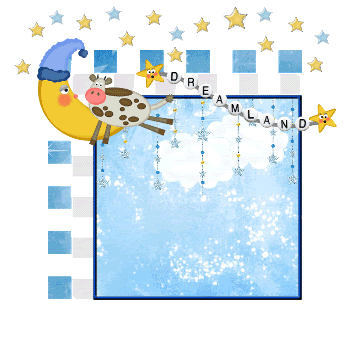
You should have something like this:
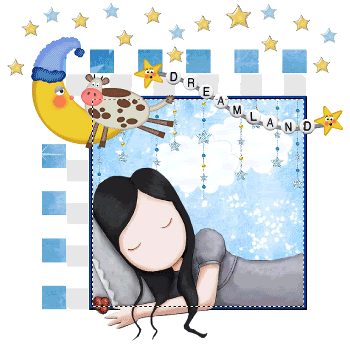
Paste tube of choice as new layer
Resize as necessary
Place in position
With your Magic Wand select the inner area of your FRAME layer
Resize as necessary
Place in position
With your Magic Wand select the inner area of your FRAME layer
Activate your tube again and carefully erase the excess overhanging FRAME on either side
Deselect
Resize
Activate BACKGROUND SQUARES layer
Duplicate
Duplicate
Effects > Distortion Effects > Polar Coordinantes with the following settings:
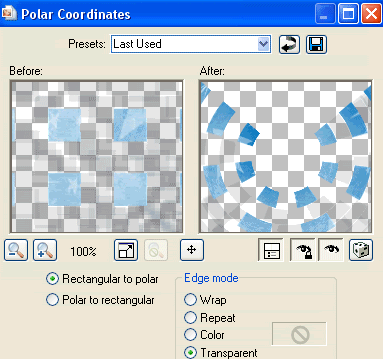
Image > Flip
Move layer down to a more centred position
Adjust > Blur > Gaussian Blur
Radius - 10.00
Adjust > Blur > Gaussian Blur
Radius - 10.00
Effects > Texture Effects > Mosaic Antique with the following settings:
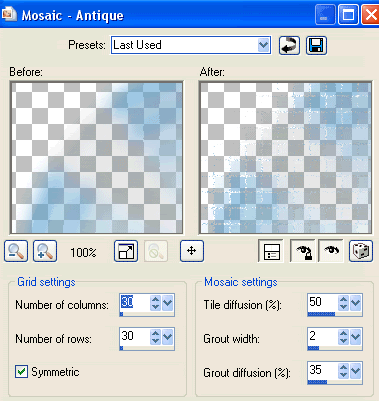
Lower opacity to 40
Select your Text Tool and font of choice
I am using 2Peas Fat Frog
Choose a colour from your tag
Set your Material Properties to the following:
Foreground - #FFFFFF
Background - #1478d0 (or colour of choice)
I am using 2Peas Fat Frog
Choose a colour from your tag
Set your Material Properties to the following:
Foreground - #FFFFFF
Background - #1478d0 (or colour of choice)
Stroke width - 2.2 (depending on font)
Type out your name
Add some noise then a drop shadow:
H & V - 1
Opacity - 320
Blur - 3.00
Colour - #1f497f
Add some noise then a drop shadow:
H & V - 1
Opacity - 320
Blur - 3.00
Colour - #1f497f
Finally, add your © copyright, licence and watermark
**THE NEXT STEP IS FOR ANIMATION**
Activate BACKGROUND SQUARES AGAIN
Duplicate twice for a total of three layers
Rename layers Bling1, Bling2 and Bling3
Duplicate twice for a total of three layers
Rename layers Bling1, Bling2 and Bling3
Hide Bling2 and Bling3
Activate Bling1
Activate Bling1
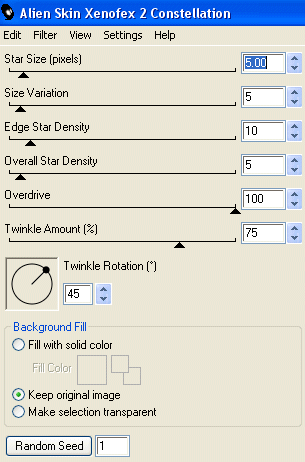
Effects > Plugins > Alien Skin Xenofex 2 > Constellation
Under Settings select BlingBling then use the following settings:
Under Settings select BlingBling then use the following settings:
Edit > Copy Merged
Open Animation Shop
Edit > Paste as New Animation
Open Animation Shop
Edit > Paste as New Animation
Hide Bling1 and activate Bling2
Repeat Constellation effect, changing the Random Seed
Repeat Constellation effect, changing the Random Seed
Edit > Copy Merged
Open Animation Shop
Edit > Paste After Current Frame
Open Animation Shop
Edit > Paste After Current Frame
Hide Bling2 and activate Bling3
Repeat Constellation effect, again changing the Random Seed
Repeat Constellation effect, again changing the Random Seed
Edit > Copy Merged
Open Animation Shop
Edit > Paste After Current Frame
Open Animation Shop
Edit > Paste After Current Frame
Now Edit > Select All, then
Animation > Frame Properties
Set properties to 20
Animation > Frame Properties
Set properties to 20
Finally save as a GIF and you're done!
Thank you for trying my tutorial!
::st!na::
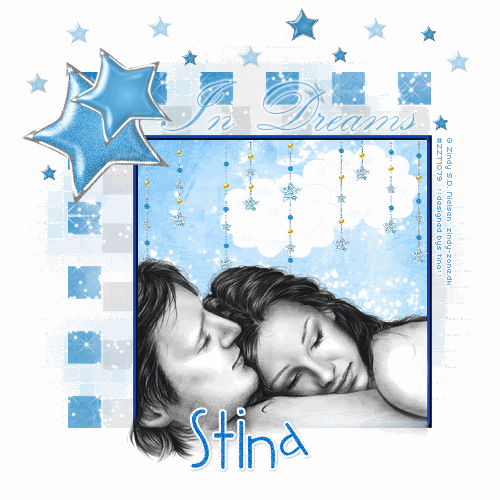
Here is another one I made:
© Tutorial written by Stina on 20th April 2009
All rights reserved
No comments:
Post a Comment