
Supplies
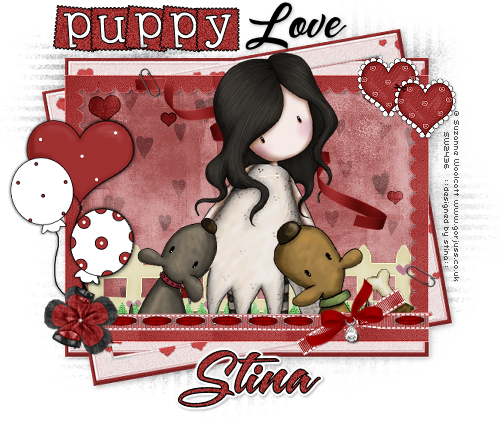
Scrap kit of choice - I am using "Hopelessly Devoted" by Jillian's Creations which can be purchased at Creative Scraps
Tubes of choice - I am using the gorjuss artwork of Suzanne Woolcott which can be purchased from her store
**PLEASE DO NO USE HER ARTWORK WITHOUT THE APPROPRIATE LICENCE**
Fence and Grass elements from "Spring is Here" kit by PinkPrincess which can be purchased from The Scrappin Divaz Designz
WSL_Mask81 by Chelle
Fonts of choice - 2Peas Gone Postal and A&S Snapper Script
~ Step 1 ~
Open Mask and minimise for later
Open a new 650 x 550 blank canvas flood-filled white
Paste Frame5 as new layer and position in the centre
Resize by 80%
Resize by 80%
With your Magic Wand click inside the frame
Selections / Modify / Expand by 10
Paste Paper2 as new layer
Resize by 60%
Position inside selection
Selections / Invert
Delete
Selections / Modify / Expand by 10
Paste Paper2 as new layer
Resize by 60%
Position inside selection
Selections / Invert
Delete
KEEP SELECTED
Paste Paper4 as new layer
Resize by 60%
Position inside selection
Selections / Invert
Delete
Lower opacity to 60
Layers / Merge / Merge Down
Resize by 60%
Position inside selection
Selections / Invert
Delete
Lower opacity to 60
Layers / Merge / Merge Down
KEEP SELECTED
Paste Paper12 as new layer
Resize by 60%
Position inside selection
Selections / Invert
Delete and deselect
Layers / Merge / Merge Down
Resize by 60%
Position inside selection
Selections / Invert
Delete and deselect
Layers / Merge / Merge Down
Layers / Arrange / Move Down
Activate your Frame layer again
Duplicate
Apply a drop shadow:
H & V - 2
Opacity - 30
Blur - 5.00
Colour - #000000
Duplicate
Apply a drop shadow:
H & V - 2
Opacity - 30
Blur - 5.00
Colour - #000000
Repeat drop shadow changing the Horizontal and Vertical drops to -2
Layers / Arrange / Move Down
With your Selection Tool draw a rectangle around the Frame:
Selections / Invert
Delete and deselect
Paste Frame2 as new layer
Position directly behind main Frame
Paste Frame1 as new layer
Position directly over Frame2
Set blend mode to Screen
Resize this layer by 98%
Layers / Merge / Merge Down
Position directly behind main Frame
Paste Frame1 as new layer
Position directly over Frame2
Set blend mode to Screen
Resize this layer by 98%
Layers / Merge / Merge Down
Add a drop shadow:
H & V - 2
Opacity - 30
Blur - 10.00
Colour - #000000
H & V - 2
Opacity - 30
Blur - 10.00
Colour - #000000
You should now have something like this:
~ Step 2 ~
Paste a Fence as a new layer (I am using one from PinkPrincess' kit "Spring is Here" from The Scrappin Divaz Designz)
Resize by 23%
Duplicate
Adjust / Hue & Saturation / Colourise
Hue - 30
Saturation - 45
Resize by 23%
Duplicate
Adjust / Hue & Saturation / Colourise
Hue - 30
Saturation - 45
Paste some Grass (also from the "Spring is Here" kit)
Resize by 12% and place low in front of the fence
Resize by 12% and place low in front of the fence
Paste BowedRibbonRed as new layer
Position across bottom of frame to your liking
Position across bottom of frame to your liking
Paste EyeletRibbonRowRed as new layer
Resize by 35%
Position along the inside of the ribbon up to the bow
Duplicate and position on the other side of bow
Layers / Merge / Merge Down
Resize by 35%
Position along the inside of the ribbon up to the bow
Duplicate and position on the other side of bow
Layers / Merge / Merge Down
Erase any excess overhanging the edge of the Frame
Paste BowRed as new layer
Resize by 35%
Position over bow on ribbon
Resize by 35%
Position over bow on ribbon
Paste FabricFlowerBlack as new layer
Resize by 30%
Position in lower left corner
Paste FabricFlowerRed as new layer
Resize by 23%
Position over the Black flower
Add a slight drop shadow, then
Layers / Merge / Merge Down
Resize by 30%
Position in lower left corner
Paste FabricFlowerRed as new layer
Resize by 23%
Position over the Black flower
Add a slight drop shadow, then
Layers / Merge / Merge Down
Paste HeartClipArt as new layer
Resize by 40%
Place in top right corner
Resize by 40%
Place in top right corner
Paste PaperClipBlack as new layer
Image / Rotate by 30 to the left
Resize by 50%
Position somewhere along the top
Use your Freehand Tool to draw out around the inside of the PaperClip
Then delete
Image / Rotate by 30 to the left
Resize by 50%
Position somewhere along the top
Use your Freehand Tool to draw out around the inside of the PaperClip
Then delete
Duplicate
Image / Mirror then Image / Flip
Image / Rotate by 30 to the left
Adjust / Sharpness / Unsharpen Mask
Raduis - 1.00
Strength - 100
Clipping - 4
Image / Mirror then Image / Flip
Image / Rotate by 30 to the left
Adjust / Sharpness / Unsharpen Mask
Raduis - 1.00
Strength - 100
Clipping - 4
You should have something like this:
~ Step 3 ~
Ok add your tube of choice
I added a selection of Gorjuss tubes
I added a selection of Gorjuss tubes
Place your tube in position
Then duplicate
Move the duplicate to a layer above the Frame
Turn the visibility off so we can work on the original
Then duplicate
Move the duplicate to a layer above the Frame
Turn the visibility off so we can work on the original
Add a few extra tubes or elements if you wish
Apply a slight drop shadow of choice
Apply a slight drop shadow of choice
With your Selection Tool draw a rectangle around the Frame once again
Selections / Invert
Activate each of your tube layers overhanging from beneath the Frame
Delete on each layer
Deselect
Selections / Invert
Activate each of your tube layers overhanging from beneath the Frame
Delete on each layer
Deselect
Now activate the copy of the tube you moved to above the Frame and make it visible
Draw a selection around the bottom half of your tube with your Freehand Tool
Then delete
Draw a selection around the bottom half of your tube with your Freehand Tool
Then delete
Now it looks like your tube is protruding from within the bottom of the Frame out through the top
Now crop and resize
~ Step 4 ~
Activate your Background layer
Paste Paper12 as new layer
Resize by 65%
Resize by 65%
Layers / New Mask Layer / From Image
Locate WSL_Mask81
Source Luminance
OK
Locate WSL_Mask81
Source Luminance
OK
In your Layer Palette activate the Mask layer and resize it by 105%
Layers / Merge / Merge Group
Select your Text Tool and choose a font of your choice - I am using 2Peas Gone Postal
Stroke Width - 1.00
Stroke Width - 1.00
Foreground - #000000
Background - #9e3030
Background - #9e3030
Type in the word "Puppy"
Add some noise
Add some noise
Change to a script font and toggle the Background/Foreground colours in your Material Properties
Switch off your Foreground
Switch off your Foreground
Foreground - null
Background - #000000
Background - #000000
Type the word "Love
Select your font of choice and matching colours (I used the same as previous)
Type out your name, add some noise and a Gradient Glow
Apply a slight drop shadow
Type out your name, add some noise and a Gradient Glow
Apply a slight drop shadow
Finally add your © copyright, licence and watermark, save as GIF or JPG and you're done!
Thanks for trying my tutorial
::st!na::
© Tutorial written by Stina on 5th March 2009
All rights reserved
All rights reserved
No comments:
Post a Comment