
Supplies
Scrap kit of choice - I am using the delightful "Kaci" kit by DMK Designs which is available from Creative Scraps, Simply Beautiful Scraps and TKO Scraps
Tube of choice - I am using the artwork of Jamie Kidd which can be purchased from CILM
**PLEASE DO NOT USE HER ARTWORK WITHOUT THE APPROPRIATE LICENCE**
WSL_Mask226 by Chelle available on her blog
Font of choice - I am using Bickham Script Pro Regular
~ Step 1 ~
OK...we are going to start by creating our own template! *g*
But I'll be kind...I promise...
Open a new 600 x 600 blank canvas flood-filled white
Select your Preset Shape Tool to Rectangle
Foreground - null
Background - #000000
Draw out a rectangle
Objects / Align / Horizontal Centre in Canvas
Convert to raster layer
Foreground - null
Background - #000000
Draw out a rectangle
Objects / Align / Horizontal Centre in Canvas
Convert to raster layer
Select your Text Tool and the find the font Impact
Keep your Background set to #000000
You will need to set the font size rather large - I set mine to 85
Keep your Background set to #000000
You will need to set the font size rather large - I set mine to 85
Type out the word "SPRINGTIME" in all caps
Objects / Align / Horizontal Centre in Canvas
Convert to Raster Layer
Objects / Align / Horizontal Centre in Canvas
Convert to Raster Layer
Use the nodes on your Pick Tool on the Rectangle to size it in line with the text
Layers / Merge / Merge Down
Rename this layer Template1
Layers / Merge / Merge Down
Rename this layer Template1
Adjust the opacity to 45
Draw a long narrow rectangle across ways near the top of Template1
Objects / Align / Horizontal Centre in Canvas
Convert to Raster Layer
Duplicate and move it to the bottom of Template1
Layers / Merge / Merge Down
Rename this layer to Template2
Objects / Align / Horizontal Centre in Canvas
Convert to Raster Layer
Duplicate and move it to the bottom of Template1
Layers / Merge / Merge Down
Rename this layer to Template2
Adjust the opacity to 55
Toggle the Foreground/Background in the Material Palette so that the Colour is now in your Foreground
Your background should now be null
Set the Line width to 8.00
Draw out a rectangle around the inside of Template1
Use the nodes of your Vector layer to adjust the size
Objects / Align / Horizontal Centre in Canvas
Convert to raster layer
Rename this later to Template3
Your background should now be null
Set the Line width to 8.00
Draw out a rectangle around the inside of Template1
Use the nodes of your Vector layer to adjust the size
Objects / Align / Horizontal Centre in Canvas
Convert to raster layer
Rename this later to Template3
Adjust the opacity to 65
Select a Star from your Preset Shapes
Draw out the shape of a large Star to the right
Convert to raster layer
Rename this layer to Template4
Draw out the shape of a large Star to the right
Convert to raster layer
Rename this layer to Template4
Adjust the opacity to 75
On the left draw out three smaller stars
Layers / Merge / Merge Down
Repeat
Duplicate
Image / Mirror
Layers / Merge / Merge Down
Rename this layer to Template5
Layers / Merge / Merge Down
Repeat
Duplicate
Image / Mirror
Layers / Merge / Merge Down
Rename this layer to Template5
Adjust the opacity to 85
You should now have a Template like this:

~ Step 2 ~
Activate Template1
Selections / Select All
Selections / Float
Selections / Defloat
Add a new raster layer
Paste Paper14 into Selection
Deselect
Delete Template1 layer
Selections / Select All
Selections / Float
Selections / Defloat
Add a new raster layer
Paste Paper14 into Selection
Deselect
Delete Template1 layer
Activate Template2
Selections / Select All
Selections / Float
Selections / Defloat
Add a new raster layer
Selections / Select All
Selections / Float
Selections / Defloat
Add a new raster layer
Open Paper21
Image / Rotate by 90 to the right
Edit / Copy
Image / Rotate by 90 to the right
Edit / Copy
Back on new layer of working canvas
Paste into Selection
Deselect
Delete Template2
Paste into Selection
Deselect
Delete Template2
Activate Template3
Selections / Select All
Selections / Float
Selections / Defloat
Add a new raster layer
Paste Paper20 into Selection
Deselect
Delete Template3
Selections / Select All
Selections / Float
Selections / Defloat
Add a new raster layer
Paste Paper20 into Selection
Deselect
Delete Template3
Activate Template4
Selections / Select All
Selections / Float
Selections / Defloat
Add a new raster layer
Paste Paper13 into Selection
Deselect
Delete Template4
Selections / Select All
Selections / Float
Selections / Defloat
Add a new raster layer
Paste Paper13 into Selection
Deselect
Delete Template4
Activate Template5
Selections / Select All
Selections / Float
Selections / Defloat
Add a new raster layer
Paste Paper05 into Selection
Deselect
Delete Template5
Selections / Select All
Selections / Float
Selections / Defloat
Add a new raster layer
Paste Paper05 into Selection
Deselect
Delete Template5
Your Template should now look like this:

~ Step 3 ~
Paste Frame03 as new layer
Resize by 30%
Position in centre of Template
Resize by 30%
Position in centre of Template
Use your Magic Wand to select the area inside the Frame
Selections / Modify / Expand by 10
Add new raster layer
Paste Paper16 into Selection
Deselect
Layers / Arrange / Move Down
Selections / Modify / Expand by 10
Add new raster layer
Paste Paper16 into Selection
Deselect
Layers / Arrange / Move Down
Paste some flowers as new layers
Resizing them to around 8%
Position them to the left of the Frame
Layers / Merge / Merge Down
Repeat till all flowers are one layer
Resizing them to around 8%
Position them to the left of the Frame
Layers / Merge / Merge Down
Repeat till all flowers are one layer
Duplicate
Image / Mirror
Image / Mirror
Paste DoodleFlower01 as new layer
Resize by 10%
Position behind flowers
Resize by 10%
Position behind flowers
Paste DoodleFlower02 as new layer
Resize by 12%
Image / Mirror
Position beside other DoodleFlower and slightly down
Layers / Merge / Merge Down
Resize by 12%
Image / Mirror
Position beside other DoodleFlower and slightly down
Layers / Merge / Merge Down
Duplicate
Image / Mirror
Image / Mirror
Paste Butterfly05 as new layer
Resize by 8%
Position to the left
Resize by 8%
Position to the left
Paste Butterfly06 as new layer
Image / Mirror
Resize by 8%
Position to the right
Image / Mirror
Resize by 8%
Position to the right
Paste Ladybug as new layer
Image / Rotate by 20 to the right
Resize by 8%
Position above the I in "Springtime"
Image / Rotate by 20 to the right
Resize by 8%
Position above the I in "Springtime"
Paste Butterfly04 as new layer
Image / Rotate by 20 to the left
Resize by 7%
Position on the "S"
Image / Rotate by 20 to the left
Resize by 7%
Position on the "S"
Paste Butterfly03 as new layer
Image / Rotate by 40 to the right
Resize by 7%
Position on the "E"
Image / Rotate by 40 to the right
Resize by 7%
Position on the "E"
Duplicate
Image / Mirror
Position in the upper left
Image / Mirror
Position in the upper left
Paste PolkaDotRibbon&Eyelet as new layer
Image / Rotate by 50 to the right
Resize by 9%
Position in upper right
Image / Rotate by 50 to the right
Resize by 9%
Position in upper right
Paste PolkaDotBow as new layer
Resize by 12%
Position over bow on Eyelet
Resize by 12%
Position over bow on Eyelet
ACTIVATE CIRCLE FRAME LAYER!
Paste SatinFlowerHeart01 as new layer
Image / Rotate by 20 to the left
Resize by 12%
Position BEHIND flowers to the left
Image / Rotate by 20 to the left
Resize by 12%
Position BEHIND flowers to the left
Paste WordLabel02 as new layer
Image / Rotate by 22 to the left
Resize by 35%
Position at top of the Frame
Layers / Arrange / Move Down
Repeat
Image / Rotate by 22 to the left
Resize by 35%
Position at top of the Frame
Layers / Arrange / Move Down
Repeat
Adjust the Butterfly on the corner to rest on the corner of the label
Paste Paper15 as new layer
Layers / Arrange / Send to Bottom
Resize by 50%
Layers / New Mask Layer / From Image
Locate WSL_Mask226
OK
Layers / Merge / Merge Group
Layers / Arrange / Send to Bottom
Resize by 50%
Layers / New Mask Layer / From Image
Locate WSL_Mask226
OK
Layers / Merge / Merge Group
Move Mask layer up slightly so that it is directly behind Template
Apply some slight drop shadows to your elements
Crop and resize
~ Step 4 ~
Paste tube as new layer
Resize as necessary
Resize as necessary
With your Magic Wand select inside the Frame
Selections / Modify / Feather by 2
Selections / Invert
Selections / Modify / Feather by 2
Selections / Invert
Use your Eraser Tool and carefully erase the bottom of the tube
Deselect
Deselect

Apply a drop shadow:
H & V - 1
Opacity - 30
Blur - 10.00
#000000
H & V - 1
Opacity - 30
Blur - 10.00
#000000
Select your Text Tool and font of choice - I am using Bickham Script Pro Regular
Foreground - null
Background - #000000
Foreground - null
Background - #000000
Type out your name
Objects / Align / Horizontal Center in Canvas
Convert to raster layer
Objects / Align / Horizontal Center in Canvas
Convert to raster layer
Apply a drop shadow:
H & V - 1
Opacity - 20
Blur - 5.00
Colour - #000000
H & V - 1
Opacity - 20
Blur - 5.00
Colour - #000000
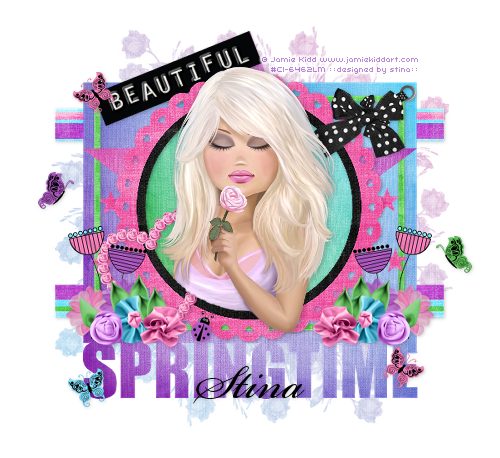
Finally, add your © copyright, licence and watermark
Then save as a GIF or JPG and you're done!
Thank you for trying my tutorial!
::st!na::
© Tutorial written by Stina on 21st March 2009
All rights reserved
No comments:
Post a Comment